What to do?
I wanted to begin this album right away (as always) and couldn't afford to buy one especially when postage was added on top, so I decided to make my own. Another bonus for making your own is that you can add pages as you please, the Project Life album is sewn in so you only have 40 pages.
First of all I decided on the right size to cut down my Project Life page protectors. Only some protectors were going to fit the format and lucky I had a good range of Becky Higgins, American Crafts and Photo Freedom protectors.
I went hunting for an old post bound 12" x 12" album and found a few of them in the back of a cupboard.
Take the album apart and cut each cover to your required size. My album is 9" x 12 1/2" (2" are added to the length for the fold in spine)
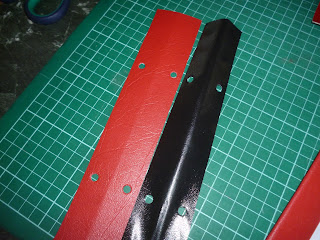
Mark where a new hole will be punched on both covers and spine piece.
Punch the new holes
Stick down duct tape over the cut edges of the covers
Cut down the page protectors to size.
Put your album back together or cover the album in paper, fabric or vinyl.
I picked up a 140cm x 50cm piece of vinyl from Spotlight for $3 and some extra wide and strong double sided tape from Cheap as Chips for $2.
Cut out the vinyl to size and place tape around all four sides of the cover. Stick it down and do the same for the other cover.
Re-punch your holes through the vinyl.
Put you album back together, you are done.
Becky Higgins Project Life album on the left, the album I made on the right.
Thanks for looking and I hope this tutorial gets you thinking about making your own albums.


No comments:
Post a Comment
Hi, I love reading your comments and if I don't reply to all of them, please know I appreciate every one.
Have a lovely day :)